3 Exercises to Strengthen Your Hip Flexors


Strengthening your hip flexors can help decrease hip and lower back pain. However, when should you do them? How do you do them? First, we need to know what these muscles are and where they are.
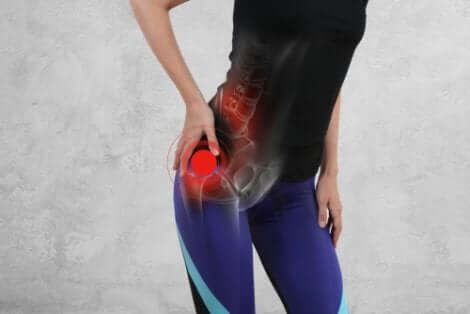
The hip flexors are the muscles that bring the knee closest to the chest. The most important are the quadriceps and the iliopsoas, and they’re located in the front of the hip and thigh. Other muscles also help flex the hip, although it’s not their main function, like hip adductors and abductors.
Therefore, strengthening your hip flexors also works other muscles, thus improving the health of your lower spine, hips, and knees. If you don’t already have these exercises in your routine, we invite you to discover their benefits and how to do them.
Why strengthen your hip flexors?
- Decreases the chance of injury in runners, athletes, and active people. Hip flexor and abductor weakness has been shown to increase the risk of injury.
- Prevents the appearance of back or hip discomfort. Working sitting down all day tends to weaken the hip flexors, since you don’t use them in that position. This weakens them in the long term, increasing the likelihood of lower back and hip pain.
- Treats back, hip, and knee pain. In people with pain in these joints, strengthening the hip flexors can decrease symptoms.
In some people, stretching these muscles is a temporary solution to a bigger problem. The problem behind muscle tension and lack of flexibility is muscle weakness. If your goal is to decrease pain, try both stretching and strengthening.
If this is the case for you, try one week of only stretching your hip flexors, and another week of only strengthening. Then, compare the results. Stick with what gives you the most benefits, or try a combination of both.
When to strengthen the hip flexors
- If you feel tension or compression in the front of the hip.
- When you have low back pain or hip pain, especially if you spend a lot of time in the same position. For example, if you stand or sit for long periods of time.
- If you’ve already done hip flexor stretches to decrease symptoms and there’s been no major difference in symptoms. In addition, if their intensity has increased or they appear intermittently.
- If you haven’t previously strengthened the hip flexors to reduce symptoms.
Also, if you try hip flexor exercises and don’t feel any improvement, then it’s best to go to a physical therapist. Then, they can do an individual treatment.
Check this out: Chronic Low Back Pain and the New Treatment for It
How to strengthen the hip flexors
Basically, you have to do hip flexion movement with some form of resistance. For example, this resistance can be gravity, rubber bands, weights, etc. Additionally, since everyone’s body is different, use the following guidelines:
- Focus on doing the movement properly. In some exercises, your lower back needs to stay curved, not flat. We’ll explain how to do this later.
- It’s not a competition to see how many reps you can do. Therefore, it doesn’t matter if you do fewer reps than you thought you could. The goal is for you to do them well.
- Finally, the exercise shouldn’t speed up your breathing. You should breathe normally throughout all reps.
3 exercises for hip flexors
First, start with 5 slow reps. Each rep should last 2 to 3 deep breaths. Only increase the number of reps if you follow the three tips above.
In addition, it’s best that you do a series of 5-10 reps every 2-3 hours, especially if you have back or hip pain. This way, the muscles stay active, and it prevents them from becoming weak due to being in a chair for so long. If you don’t have any pain, you can do 2-3 sets with the number of reps you’re comfortable doing.

1. Simple hip flexion
This exercise will teach you to learn the movement properly.
To do it:
- Lie on your back, with your knees bent and your feet flat on the floor.
- Then, place your hand in the gap between your lower back and the floor.
- Inhale as you bring your knee to your chest without squashing your hand. This way, you’ll maintain the curvature of your lumbar spine.
If you bring your knee to your chest, your lumbar spine will flatten, and it’s normal. Here, do the movement until you feel that if you go a little farther, you’ll start to squash your hand. That’s your final point.
- Finally, exhale as you return to the starting position, without increasing the space between your hand and the ground.
Once you master the movement, you can make it more difficult by following this progression. Also, you need to maintain the appropriate spinal curve in each one:
- Start with your legs straight instead of bent.
- Next, stand against the wall, with a chair next to you for support.
- Then, do it without the chair, but against the wall.
- Next, leaning against the wall, but with a chair to support you if you lose your balance.
- Finally, without the chair.
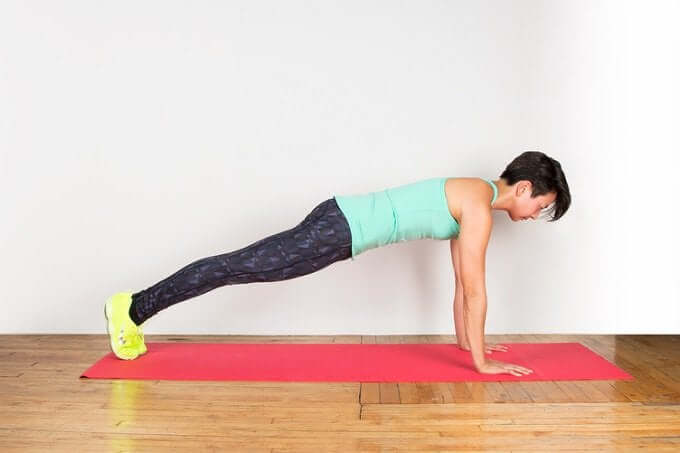
2. Plank hip flexion
This exercise doesn’t just strengthen your hip flexors, but is also good for working your abs and overall body stability. Before doing this, make sure you can properly hold a plank for at least 20-30 seconds.
To do the plank hip flexion:
- First, start with the plank pose.
- Then, bring one knee to your chest, without changing the plank.
- Finally, return to the starting position, and repeat on the other side.
If this exercise is too difficult for you, you can try standing in front of the wall, supporting yourself with your hands and body in a plank position. Then, you can do it on a chair. The idea is that you start from vertical, and little by little you lean until you can do it horizontally.
3. Beetle
Like the previous one, this exercise works the hip flexors, the abdominal muscles and the stability of your body in general. It can be difficult at first, especially if you don’t have experience. However, little by little, it’ll get easier and you’ll feel the benefits in your day-to-day life. In this exercise, you need to flatten your back against the floor to do it correctly.
To do it:
- Lie on your back, with your feet flat on the floor.
- Press against the floor with your lower back and bring your knees up so they’re at a 90-degree angle.
- Then, hold this position for 2 seconds.
If you can do it without much effort (the effort is excessive if you squeeze your face), you can try this:
- Extend your right leg as you raise your arm on that side toward your left knee.
- Then, return to the starting position slowly.
- Do the same on the other side.
Final recommendations
Remember, these exercises have cumulative effects. The secret is to do it frequently, at least once a day. With perseverance and patience, you’ll get the results you want.
All cited sources were thoroughly reviewed by our team to ensure their quality, reliability, currency, and validity. The bibliography of this article was considered reliable and of academic or scientific accuracy.
- Kak, H. B., Park, S. J., & Park, B. J. (2016). The effect of hip abductor exercise on muscle strength and trunk stability after an injury of the lower extremities. Journal of physical therapy science, 28(3), 932–935. https://doi.org/10.1589/jpts.28.932
- Andersson, E. A., Nilsson, J., Ma, Z., & Thorstensson, A. (1997). Abdominal and hip flexor muscle activation during various training exercises. European journal of applied physiology and occupational physiology, 75(2), 115–123. https://doi.org/10.1007/s004210050135
- Thorborg, K., Bandholm, T., Zebis, M., Andersen, L. L., Jensen, J., & Hölmich, P. (2016). Large strengthening effect of a hip-flexor training programme: a randomized controlled trial. Knee surgery, sports traumatology, arthroscopy : official journal of the ESSKA, 24(7), 2346–2352. https://doi.org/10.1007/s00167-015-3583-y


