Learn to Make Rosemary Soap for Oily Skin


Written and verified by psychologist Valeria Sabater
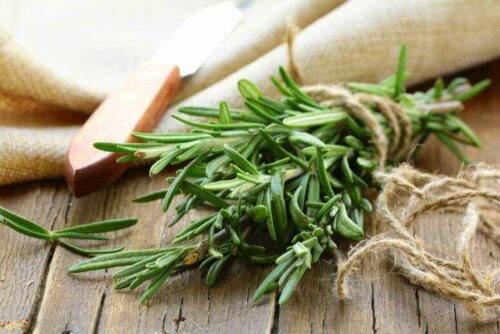
You’ll be interested in learning how to make an aromatic rosemary soap for oily skin if you prefer natural beauty products. The steps are really simple and you’ll have an exceptional beauty product with a little patience and the right ingredients.
Ok so, what’s so great about rosemary in comparison to other herbs? Well, besides being an aromatic plant, it apparently has anti-inflammatory and cleansing properties that can promote the health of the skin and soothe some minor discomforts.
More about rosemary
Find out How to Treat Dark Skin Spots
The Fundación Española de Nutrición (FEN) indicates that rosemary is a source of tannins, rosmarinic acid, folates, thiamine, riboflavin, vitamins A, C, and B6, fiber, calcium, iron, magnesium, zinc, and potassium.
“Rosemary leaves and flowering tops contain tannins (a bitter principle), vitamin C, rosmarinic acid, a saponin, and the alkaloid Rosmarin (responsible for the stimulating effect).”
The contribution of these substances can vary in the field of cosmetics. However, it’s true that several of them are present in the various formulas, in general terms.
A study published in 2000 mentioned the antioxidant potential of rosemary in the dermatological field. There’s been further research since.
Later, a study published in 2016 evaluated the anti-aging and photoprotective potential of rosemary in combination with grapefruit polyphenols.
Do you know How to Make Homemade Lavender Soap?
How to make your own rosemary soap
When making soap, it’s important to remember that you need to follow a series of basic safety precautions. You’ll be handling caustic soda. So to avoid splashing it on your skin or even breathing in the vapors, it’s a good idea to wear gloves and a face mask.
The process itself isn’t dangerous and it has been used for generations, but it’s always good to be cautious.
Ingredients
- 3/4 c. of water
- 1 c. of dried rosemary
- 1/4 c. of caustic soda
- 2 c. of olive oil
- 1 c. of rosemary tea
- 1 tbsp. of tea tree essential oil
- A plastic bowl or tub
Preparation
The first thing you’re going to make is the tea. It will be very useful because this way you ensure that your rosemary soap is effective in cleansing and caring for oily skin.
- Bring the water to boiling point and add one tablespoon of dried rosemary. Let this simmer for a few minutes, then remove the rosemary and save the liquid.
- The second step is more delicate but equally simple. You’re going to add the caustic soda to the plastic container. Please do not forget to wear gloves and a mask because as you know, this product is abrasive.
- Remember to always work with caustic soda in an open space (a balcony, terrace, or garden…) to avoid inhaling the fumes.
- Next, you’ll add the rosemary tea you made to the caustic soda. Do this very slowly to keep it from splashing. Note that when you mix these two ingredients together it will also cause fumes.
- Let the mixture cool down for at least 15 minutes.
- Add the two cups of olive oil. It should be warm. Add it very slowly, still using the safety precautions.
- Let it cool again. Then you’ll add the tea tree essential oil.
- Remember that it is always good to allow the mixture to cool down so that the essential oils will maintain all their properties.
- To speed up the process and get a homogeneous mixture, you can beat it with a mixer at low speed. Place it in the center of the bowl and don’t do anything else. Let it blend calmly and carefully.
- When you see that the ingredients are becoming thick, like mayonnaise, add the remaining dried rosemary (to produce an exfoliating effect).
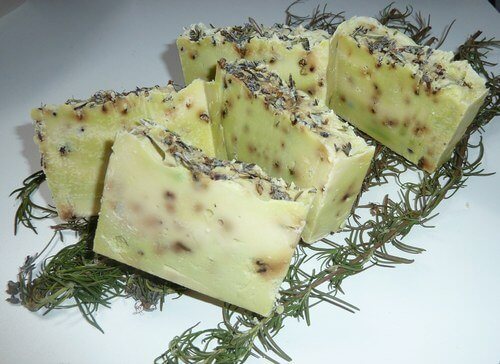
- Finally, pour this mixture into soap molds.
Final notes
A tip: add a few sprigs of rosemary in the mold beforehand, so it’ll be easier to remove the soap afterward. Also, to keep any bubbles from forming, lightly tap the molds after you filled them to get the air out.
Next step? Be patient. Let it sit for six weeks before you use it. When the soap is ready, you can use it as part of your daily beauty ritual.
Contraindications: this soap is too harsh for your intimate areas.
All cited sources were thoroughly reviewed by our team to ensure their quality, reliability, currency, and validity. The bibliography of this article was considered reliable and of academic or scientific accuracy.
- Sasikumar, B. (2012). Rosemary. In Handbook of Herbs and Spices: Second Edition. https://doi.org/10.1533/9780857095671.452
- Erkan, N., Ayranci, G., & Ayranci, E. (2008). Antioxidant activities of rosemary (Rosmarinus Officinalis L.) extract, blackseed (Nigella sativa L.) essential oil, carnosic acid, rosmarinic acid and sesamol. Food Chemistry. https://doi.org/10.1016/j.foodchem.2008.01.058
This text is provided for informational purposes only and does not replace consultation with a professional. If in doubt, consult your specialist.