Repolarize Your Hair at Home in Minutes
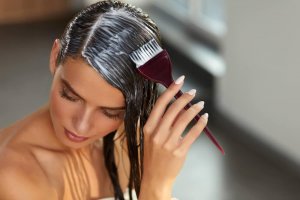
You can repolarize your hair at home even though it’s one of the many professional and alternative treatments to repair it when it starts to look dull and dry. It’s one of the most popular methods out there as it nourishes and restructures your mane at once.
In other words, it’s a cocktail of moisturizing ingredients that help restore your hair’s shine and silkiness almost instantly. While there are many beauty salons and beauty centers where you can get it done, you can also do it yourself at home.
What are the benefits? What kind of tools do you need? We know many of you are interested in trying so, continue reading to find out what it is, why it’s recommended, and how to do it.
Check out these 9 Tricks for Curling Hair Without Using Heat
The benefits you obtain when you repolarize your hair
Home hair repolarization is best for when your hair shows signs of abuse and weakness. These are often applied when there is damaged hair due to an overuse of hair straighteners, hair dryers or anything that damages the strands and follicles.
Since it’s a mixture of products with revitalizing and moisturizing properties, its regular use provides many other benefits. In fact, hairstylists recommended getting it done once a month to maintain its silky moisturizing effect.
In short, the advantages of using this hair repair method are:
- Softer moisturized hair fibers
- Stronger and more elastic hair
- More control over unruly and curly hair
- Less frizz and static
- Shinier healthier hair
Repolarizing your hair at home
An extra benefit of repolarizing your hair at home is it’s cheaper than doing it at a salon. As you may already know, professional treatments are quite expensive and not everyone can afford them.
Therefore, this alternative is ideal for people who don’t have a lot of money or don’t want to spend their money but still want their hair to look amazing. After all, you can get the things you need at available from cosmetic shops or salons at fairly reasonable prices.
Ingredients
- Regular shampoo
- 2 tbsp. of coconut oil (30 ml)
- 1 tbsp. of olive oil (15 ml)
- A keratin treatment (100 ml)
- 1 moisturizing hair mask (silkworm, duck embryo, collagen, etc., 120 ml)
Utensils
- A plastic cup
- Hair dye applicator brush
- A hair straightener
- Aluminum foil
- Hair processing cap
Preparation and application
- Firstly, wash and rinse your hair with your regular shampoo
- Then, take the coconut oil and olive oil and mix them in a plastic cup
- Add the keratin and the hair mask of your choice and mix it all
- With your hair still wet after having washed and detangled it, apply the mixture with the hair dye applicator brush
- Separate your hair into several strands to distribute the product from roots to tips
- Cover with a cap and leave on for 10 to 15 minutes
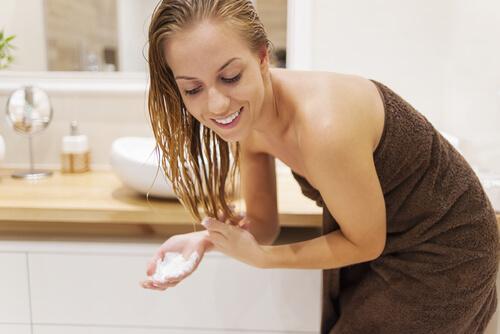
- After this time, take your hair straightener and place aluminum foil on the shiny side of its plates
- Then, be sure the hair iron is entirely covered and heat it at 350ºF
- As soon as it’s hot, divide your hair into several smaller sections
- Iron your hair gently, the idea isn’t to dry it, only seal it
- Don’t run the iron through your hair more than three times, the hair should remain moist
- When you finish ironing all your hair, cover with a heat cap and leave on for 30 to 40 minutes
- Finally, rinse it again, with cold or warm water, and without using shampoo or conditioner
- Style as usual and let it air dry to see the results
Keep in mind: The ingredient amounts may vary depending on how much hair you have. If you have a lot of hair, use a little more. The heat cap is optional. No biggie if you don’t have one.
How many times can you repolarize your hair?
You’ll surely notice that hair repolarization produces immediate effects. However, you can repeat treatment every 15 days if your hair is in really bad shape. Once a month otherwise. In any case, it’s essential to stop using hair dryers, straighteners, dyes, and any other abrasive hair treatments.
Would you like to try this wonderful hair treatment at home? As you can see, it isn’t difficult and doesn’t require strange chemicals. Just follow the instructions and enjoy revitalized soft hair in a matter of minutes.
All cited sources were thoroughly reviewed by our team to ensure their quality, reliability, currency, and validity. The bibliography of this article was considered reliable and of academic or scientific accuracy.
- Dufort, J. (2017). Aceites esenciales: Una guía práctica para conocer las propiedades de los aceites esenciales y sus aplicaciones. Robin Book. https://books.google.es/books?id=1u54DwAAQBAJ&dq=cabello+El+aceite+de+arg%C3%A1n,+el+aceite+de+macadamia+y+el+aceite+de+coco&lr=&hl=es&source=gbs_navlinks_s
- Garcia, A., & Sorel, S. (2018). Impacto negativo en la salud del cuero cabelludo y el cabello en procedimiento de alisado permanente en salones de belleza del municipio de nueva concepción escuintla. Universidad Galileo. Recuperado de: http://biblioteca.galileo.edu/tesario/handle/123456789/719
- Ortiz, G., & Beatriz, N. (2017). Estrategias pedagógicas y su influencia en la aplicación de tintes capilares en las estudiantes del instituto de belleza 22 de enero del cantón Naranjal. Babahoyo: UTB, 2017. Recuperado de: http://dspace.utb.edu.ec/handle/49000/4174
- Revista del Consumidor. (2015). Planchas alaciadoras de cabello. 42-53. Recuperado de: https://www.gob.mx/cms/uploads/attachment/file/100353/RC459_Estudio_Calidad_Plancha_Alaciadora.pdf
This text is provided for informational purposes only and does not replace consultation with a professional. If in doubt, consult your specialist.

