Get Carpal Tunnel Relief with these 5 Yoga Poses

Reviewed and approved by Doctor Carlos Fabián Avila
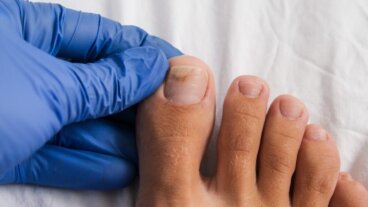
Carpal tunnel syndrome is very common today due to people overusing devices and computers. It’s caused by inflammation in the median nerve, which is responsible for providing feeling and motion to several parts of your hand.
Carpal tunnel syndrome can be produced by repetitive motion, although it’s also been related to certain infections, wrist injuries, or obesity.
The main symptom is a feeling of pain and stiffness, but it’s usually accompanied by tingling, numbness, and muscle weakness. Although most cases are mild and sporadic, it can become severe enough to require surgery.
To avoid having to resort to such extremes, it’s a good idea to start practicing some yoga poses that can help you recover from this condition. In today’s article, we want to share five of them with you.
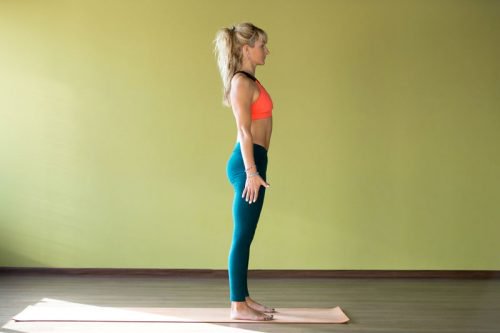
1. Mountain Pose
Read also:
Yoga helps cure depression
How do you do it?
- First of all, begin by concentrating on taking a deep breath.
- Place your feet together until your toes and heels touching.
- Lift your fingers, spread them apart, and gently press down.
- Center the weight of your body so it’s evenly distributed on both feet.
- Squeeze your knees by pressing on your kneecaps and stretching the backs of your legs.
- Tighten your abdomen, expand your chest, and keep your back straight.
- Place your arms alongside the body with your fingers down.
- Exhale and relax your shoulders with a slow movement.
- Finally, imagine a rope is tied to your forehead and gently pull your body up.
2. Bow Pose
The bow pose is a stretching and concentration exercise that helps relax muscles that are strained. It’s ideal for reducing the pain from carpal tunnel syndrome and also helps strengthen the lower back.
How do you do it?
- Lie down on your stomach with your arms at your sides and forehead resting against the mat.
- Inhale, bend your legs backward, and hold your ankles with your hands.
- At the same time, raise your head, chest, and thighs off the floor so that your body forms the shape of a bow.
- Hold this pose for 20 seconds while taking deep breaths.
- Exhale as you release your legs, and rest on the floor for 30 seconds.
3. Cow Pose
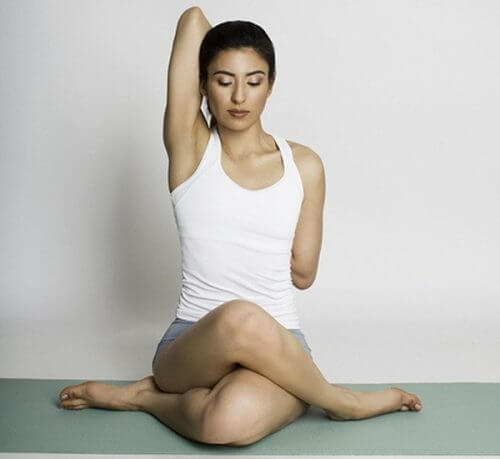
How do you do it?
- Sit on your mat and cross your legs so that the left heel is next to your right hip.
- Lift your right leg over the left and place it next to the hip on the left side.
- Raise your right arm over your head and bend it backward.
- Hook the fingers of your hands and gradually stretch your elbows in opposite directions.
- Keep your back straight and your eyes focused in front of you.
- Hold this pose for 15 to 20 seconds and then rest.
4. Prayer Pose
The prayer pose is one of the most relaxing for the body and mind and can help calm stress and pain.
How do you do it?
- Sit on a mat or rug, preferably in a very quiet place, and place your palms together as if you were praying.
- Open your fingers slightly to increase the space in the carpal tunnel, and take a deep breath, holding the pose for one minute.
Check out this article:
5. Eagle Pose
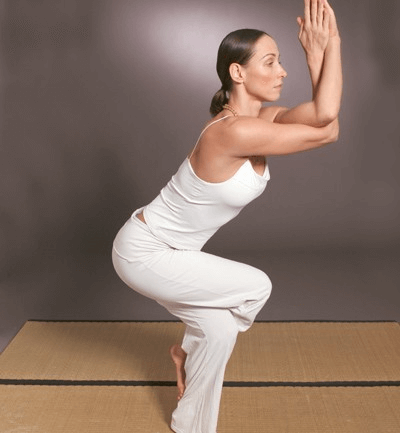
How do you do it?
- Stand in a quiet place. Bend your legs and lean gently to the left side.
- Bend your right leg and cross it over the left, so that your right ankle touches the left knee.
- At the same time, bring your left arm under the right and cross your arms at the elbows.
- Join your hands, holding one palm against the other.
- Hold this position for 30 seconds, taking deep breaths.
Are you ready to try these at home? Find a calm space and try these poses as part of your carpal tunnel treatment.
All cited sources were thoroughly reviewed by our team to ensure their quality, reliability, currency, and validity. The bibliography of this article was considered reliable and of academic or scientific accuracy.
- F. del Canto Álvarez, J.R. Sanz Giménez-Rico, & A. Vázquez Barquero. (2011). Síndrome del túnel carpiano . Actualización en el diagnóstico y tratamiento. Journal of Caring Sciences.
- Alvayay, C. S., & Arce, A. (2008). Revisión sistemática de tratamientos fisioterapéuticos con mejor evidencia para el síndrome del túnel carpiano (Systematic review of physiotherapy treatments with better evidence for the carpal tunnel syndrome) [Spanish]. Revista de La Sociedad Espanola Del Dolor.
- Sánchez-Andrada, R. M., Martínez-Salcedo, E., De Mingo-Casado, P., Domingo-Jiménez, R., Puche-Mira, A., & Casas-Fernández, C. (1998). Síndrome del túnel carpiano en la infancia. A propósito de un caso de debut precoz. Revista de Neurología.
- Andani Cervera, J., Balbastre Tejedor, M., Gómez Pajares, F., Garrido Lahiguera, R., & López Ferreres, A. (2017). Valoración del cuestionario de Boston como screening en patología laboral por síndrome del tunel carpiano Correspondencia. Rev Asoc Esp Med Trab • Marzo.
This text is provided for informational purposes only and does not replace consultation with a professional. If in doubt, consult your specialist.