Challenge Your Creativity with These 7 Original Ideas to Decorate Bottles
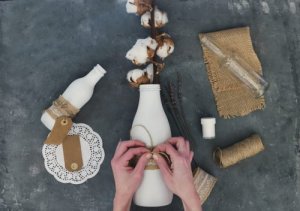
Do you want to learn some tricks to decorate bottles?
Reusing bottles and decorating them to adorn your home is an ecological activity that can also help to take care of the environment. Besides, it only requires a simple and fun process that lets your creativity shine!
The amount of trash in our home increases every year, and this increases contamination. As much as recycling campaigns are important, we ourselves can also opt to reduce and reuse our discarded items.
Reusing an object means providing a different function than what the item was created for.
This way, the object is used and this decreases the amount of trash in landfills.
The impact on the environment is direct and positive. At the same time, it can help create original objects to decorate our home.
Before throwing bottles that you no longer use in the trash, check out our list of ideas to decorate them and bring some color to your home.
1.Painted bottles
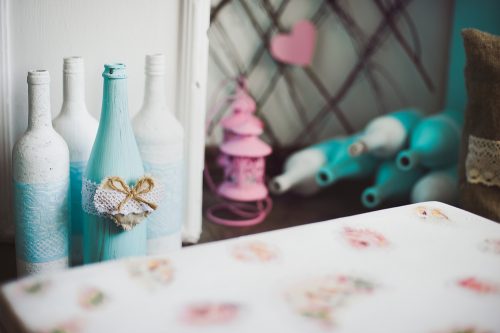
With this technique, you’ll use your imagination and will be able to opt for the design that you like the best.
You can choose a fun, colorful design, a traditional design or even a Christmas design to decorate bottles. The materials are very inexpensive and the result will be beautiful in your home.
Materials
- Glass bottle
- Fingernail polish or acrylic paint
- Adhesive or electrical tape
- Scissors
- Paint brush
Instructions
- The first step is to clean the bottle well, inside and out.
- With hot water, remove the label and the residual glue.
- Once clean, use the tape to mark the lines to make them perfect.
- Choose the nail polish or acrylic paint that you like.
- Paint between the lines with the brush.
- Allow to dry, and, if necessary, apply a second coat of paint.
- Once the paint has dried completely, remove the tape.
We recommend: 13 simple hints that will help you organize your house in a short time
2. Chalkboard-style bottle
This is an original and fun technique that will allow you to write whatever you want and erase on the bottle.
You can use your own writing to put the names of your family members on the bottle, a message, or even a joke. It’s up to you!
Materials
- Empty glass bottles
- Black chalkboard paint
- Paint brush or roller
- Chalk
Instructions
- Wash the bottle and remove the label.
- Add several layers of black chalkboard paint.
- Remember to take time to allow each layer of paint to dry before adding the next one.
- You can use a brush or roller, whichever is easier for you to use.
- Once the paint has dried completely, you can use the white chalk or colored chalk to write on the bottle.
- To erase the chalk, you can use a rag or moist paper towel or napkin.
- These bottles will add a unique touch to your home. The best thing of all is that they serve as a vase on your table. If you like, you can put flowers or candles in them.
3. Bottles converted into magic lamps
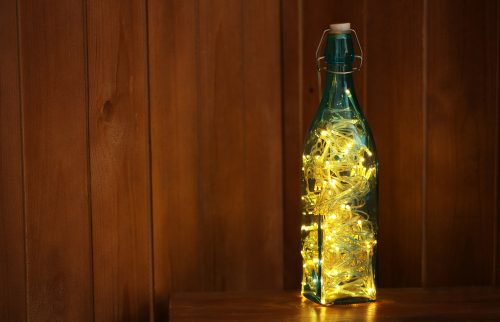
A magic touch to your home, this lamp will add some light to your patio or any other space that you would like.
With Christmas lights inside a bottle, you will have a lamp that will produce a very soft glow, creating a romantic and inviting ambiance.
Materials
• A bottle with thick glass, preferable a wine bottle
• A string of Christmas lights
• Masking tape
• A small drill
• A little piece of sand paper
• Safety glasses, mouth cover, and work gloves
Instructions
- •Remove all the labels until you have a clean surface.
- Put two wide strips of the masking tape that measures about 2 inches in diameter on the lower part of the bottle on one of its sides. This is to mark the place where you will make the opening to insert the cord for the lights.
- Carefully, drill a hole in the bottle where the tape is.
- Don’t put too much pressure on the bottle and remember to drill on top of the tape.
- Once the hole is made, use the sandpaper to remove any roughness and sharp edges around opening.
- Next, gently insert the string of lights through the mouth of the bottle, starting with the part of the cord that has the end that plugs into the wall.
- NOTE: If this method of drilling the opening is too difficult, you can opt to omit the opening. If this is the case, it’s possible to insert the cord and leave the part that plugs in outside of the mouth of the bottle.
4. Bottles decorated with contact paper
Using contact paper is very practical in the world of decoration.
You can find it in any craft store where you will find many sizes and designs to choose from.
Materials
Instructions
- Rinse the bottles that you want to decorate and take off the labels.
- Use the tape measure to determine where you want to place the contact paper.
- Cut the paper where you have measured it.
- Repeat these steps , adding strips as you like. Take into account that the design should be harmonious.
- You can also cut the strips in half so that you have narrower strips.
- These bottles can be used for decoration or for containers for pencils, pens, makeup, or, brushes or other items.
In the case of plastic bottles, we suggest that you add weight at the bottom by using small stones about on fifth the size of the bottle.
Also read: Ideas to reuse and recycle bottle corks
5. Picture frames from bottles
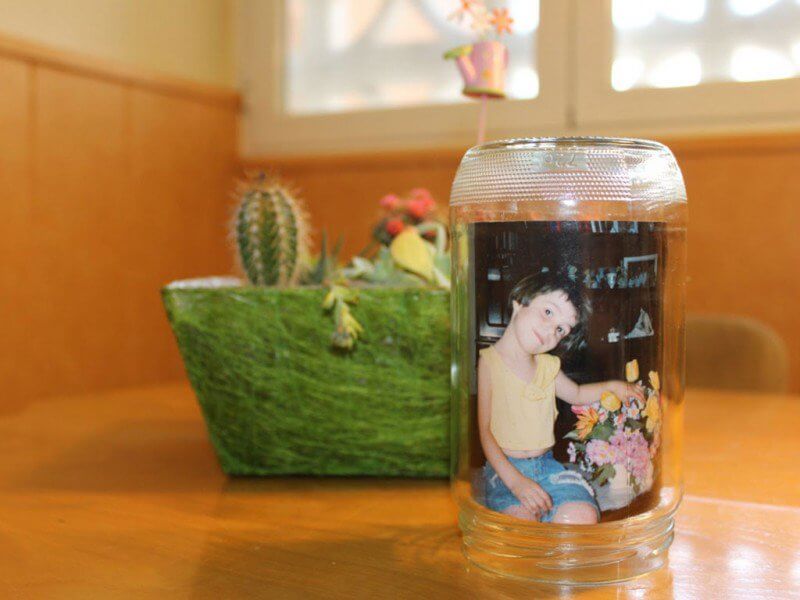
One of the things that everyone tends to have in their homes are family photos.
The following technique allows you to diversify your picture frames with an ecological and clever touch that will surprise your guests.
Materials
- Glass bottles of any size
- A picture printed on photo paper
- Scissors
- Corks or bottle tops
Instructions
- Wash the bottles well and remove the labels.
- Roll the photo with the picture toward the outside.
- Insert the photo through the mouth of the bottle and you will see that it will take the shape of the container.
- If the photo doesn’t adjust to the size of the bottle, cut the photo again to make it smaller or choose a smaller photo.
- Later, the bottle can be closed with a cork and this will protect the bottle from outside agents.
The photo may be in color, although a black and white or sepia photo can give an antique touch.
Also, you can add more decorations to the bottle by using tape or bows.
6. Bottles decorated with yarn, wire or cloth
A simple bottle can be converted into a lovely vase for the living room, kitchen, or as a center piece with other bottles.
With colorful fabric and yarn, you can transform a bottle into an incredible piece of art in a short time.
Materials
- Glass or plastic bottles
- Colorful fabric
- Glue gun
- Scissors
Instructions
- Wash the bottles and allow to dry well.
- Start by gluing fabric or yarn at the bottom and moving up, putting a little bit of glue on the bottle itself.
- After this, move up the bottle adding glue a little at a time to affix the fabric and yarn.
- You can alternate the colors of yarn and fabric, adding the ends of the yarn and winding up toward the top of the bottle. At the end of the fabric or yarn, make sure you add a little bit of glue.
- Continue wrapping the bottle until the entire bottle is covered.
Remember that you can always add other decorative materials such as bows, plastic flowers or even buttons. Use your creativity!
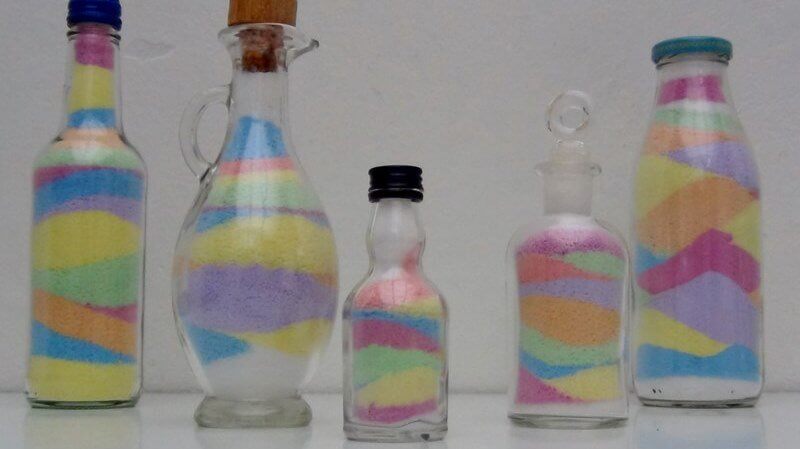
7. Bottles decorated with colored sand
Materials
- Transparent glass bottles, preferably in exotic shapes and with wide mouths
- Colored sand
- Funnel
- Paint brush
- Cork or lid
Instructions
- Wash the bottle well and remove the labels.
- Once it’s dry, add the sand using the funnel.
- With the help of a long stick or the end of a long paint brush, distribute the sand according to how you want it.
- Continue adding the colored sand. You can put it together with beach sand or use coloring to color the sand.
All cited sources were thoroughly reviewed by our team to ensure their quality, reliability, currency, and validity. The bibliography of this article was considered reliable and of academic or scientific accuracy.
- EcoInventos. [Internet]. Ideas creativas para reciclar o reutilizar botellas de plástico. 2017. Disponible en: https://ecoinventos.com/ideas-creativas-para-reciclar-o-reutilizar-botellas-de-plastico/#2
- Guía de Manualidades. [Internet]. De envase de vidrio a jarrón decorado. 2012. Disponible en: https://www.guiademanualidades.com/de-envase-de-vidrio-a-jarron-decorado-11718.htm
- Hurtado Moreno, Juan José. Aprovechamiento de la basura doméstica como medio de sustentabilidad en la Ciudad de México. [Internet]. 2011. Disponible en: https://repositoriodigital.ipn.mx/bitstream/123456789/5473/1/1314501462534erFOROSUSTEN.pdf
This text is provided for informational purposes only and does not replace consultation with a professional. If in doubt, consult your specialist.


