How to Make Your Own DIY Bookshelf at Home
Bookshelves are really useful because they keep things organized and in their place and help you make the best of your wall space. Nowadays, people often make their own beautiful and creative DIY bookshelf.
Many times, we feel there aren’t enough options for organizing our home since we have so many things. That’s why furniture that provides organization space and doesn’t occupy a lot of space is quite popular.
Books are precious objects that you must store correctly. After all, you can’t store them just anywhere.
Moisture, insects, and other factors can affect them. On the other hand, if you don’t store them well, their spine can break or they may deteriorate in other ways.
Once we designate a place for them, we must think about how we’re going to organize them. Do we do it by color, in alphabetical order, by size, by edition, or by genre? Do we display them horizontally or vertically?
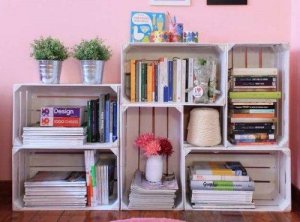
A good bookshelf lets you organize your books in a pleasant and useful way.
In fact, they allow you to place some other objects on them to accompany your books and beautify the space. You can put anything on bookshelves, from vases to small ornamental figures.
One bookshelf, many styles
A bookshelf consists of overlapping elements fixed onto the wall. These elements allow you to place different objects on them. A bookshelf’s style will depend on the materials you have on hand.
In this article, we’ll share two bookshelf styles whose designs will allow you to save space in your home.
See also: How to Care For Wood Furniture
Classic bookshelf

This type of shelf is very simple but highly functional. Classic bookshelves usually have brackets to hold them in place.
Materials
- 1 drill
- Screws
- A ruler or tape measure
- Package of wall plugs (of the width of the screws used).
- 1 pair of brackets (may be made of wood or metal).
- A 15-cm deep, 1-meter long wooden board
How to Make a DIY Bookshelf
The procedure is very simple.
- Just choose the wall where you’re going to fix the shelf. Once selected, mark where you’d like to place the shelf. To do this, use the ruler or tape measure. Make sure that the markings are equidistant.
- Then, with a pencil, mark the position of the brackets on the wall, taking the opportunity to mark the position where you’re going to screw them in.
- Drill the respective holes over the marks where you’re going to screw the brackets. Then, insert the wall plugs and screw the brackets to the wall.
Check to see if the shelf is steady and straight. Finally, place the wooden board over them and you’re good to go. If you want more shelves, just repeat the procedure as often as you need.
Take a look at this article: 5 Ideas For Beautiful Recycled Furniture That You Will Love
Floating bookshelf

This style of bookshelf has invisible or hidden from view brackets that make it look like it’s “floating” on the wall.
You’ll need the following materials and tools to make this kind of shelf:
- Pencil
- Paintbrush
- Drill
- White paint
- White glue
- 12 4-cm nails
- 1 ruler or tape measure
- 8 long screws (6 cm)
- One 1-meter long and 4-cm x 4-cm thick wood strip (mark it #1).
- One 1-meter long, 15-cm deep, and 2-cm thick wooden board (mark it #2).
- A 1.04-meter long, 4-cm deep, and 2-cm thick wood strip (mark it #3).
- Two 15-cm long, 4-cm deep, and 2-cm thick wood strips (mark them #4 and #5).
How to Make It
- Now, organize the materials and select the loadbearing wall. Mark the position and height of the shelf on the wall. To do this, take the wood strip marked #1, which will serve as a support rail for the shelf.
- Make sure it’s completely horizontal. On said line, make 4 marks every 25 cm as indicative of where the screws will be fixed to the wall.
- Take wood strip #2 and place it at the end of wood strips #4 and #5. To do this, apply some glue on one side and glue them to wood strip #1. Then, secure it with 3 nails, 5 cm away from each other.
- After that, take wood strip #3 and place it on the front edge of wood strip #2 by repeating the same procedure of the sides, with the difference that the nails will be 20 cm away from each other.
- In this step, the wood strip will already have three edges, 2 sides, and the front. Now it’s time to take the brush and paint it white on all sides. Also, paint wood strip #1 that will be the support rail.
- Drill the holes in the wall and in wood strip #1 and proceed to fix it on the wall with wall plugs and screws.
- Once done, fix wood strip #2 with its edges on the rail by screwing at 4 points, 20 cm from each other.
Presto,your floating bookshelf is finished!
You can make very original bookshelves using these tips as inspiration. It all depends on your taste and how your spaces are decorated. Whatever you decide, your bookshelf will be really functional.